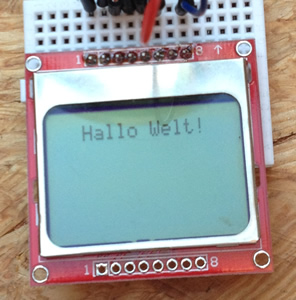
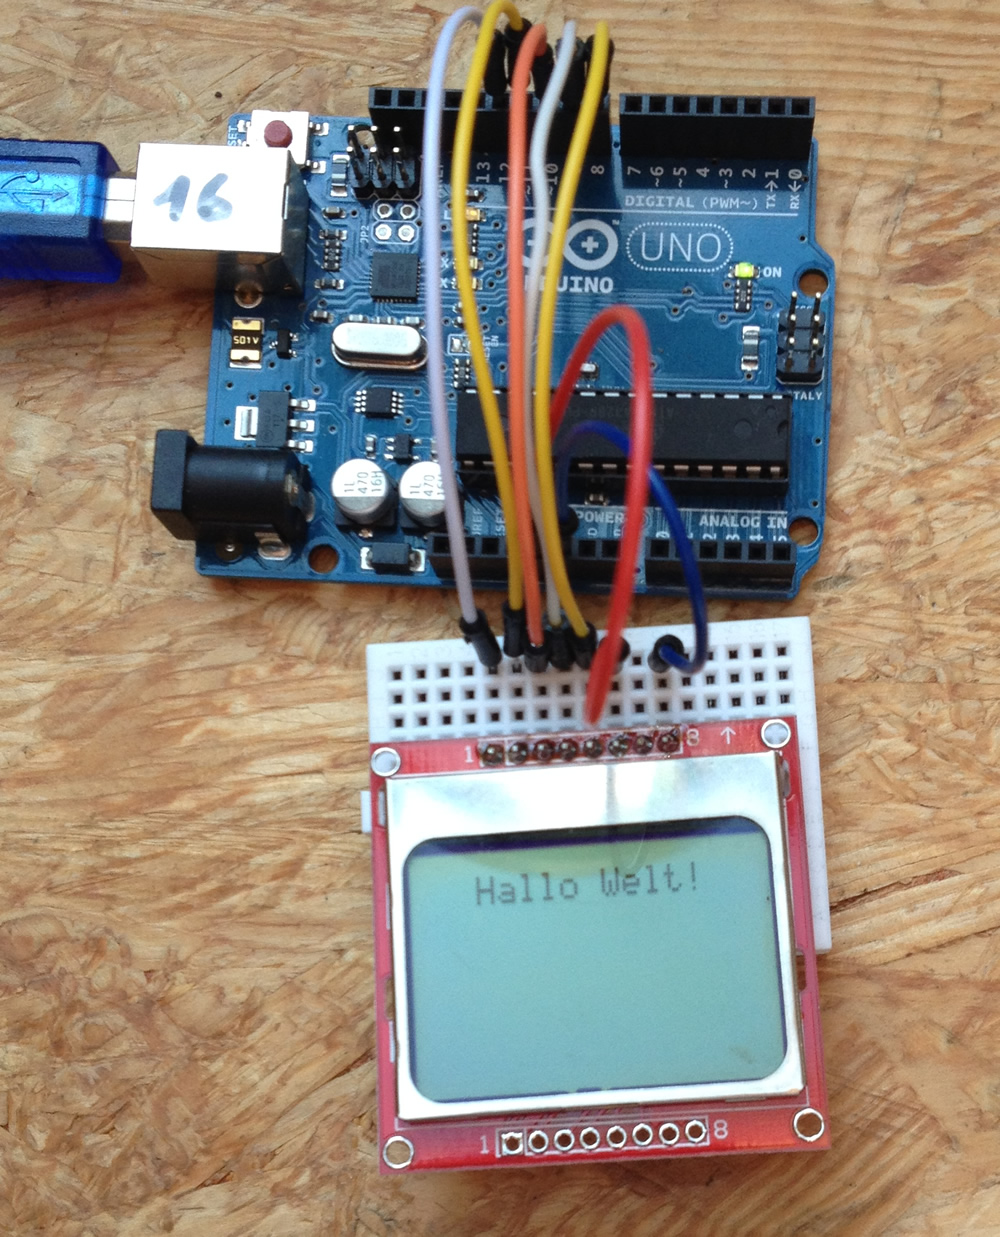
Das Nokia LCD Display 5110 ist preiswert und stromsparend und es lässt sich vom Arduino seriell ansteuern. Es hat 48 x 84 Pixel auf einer Fläche vom ca. 3 x 2 cm.
Meist wird auf einen Pegelwandler 5V > 3,3V hingewiesen. Das brauchte ich aber bei meinem Display gar nicht. Ich habe es mit 5V Spannung versorgt und auch die 5V Datenpegel direkt an das Display gegeben. Dazu sollte man aber vorher beim Lieferanten nachfragen.
Die Verkabelung ist dann wie folgt.
Arduino Uno > LCD Display
+5V > VCC
GND > GND
Pin12 > RST
Pin11 > CE
Pin10 > DC
Pin 9 > DIN
PIN8 > CLK
Eine gute Beschreibung hat Julian Ilett hier zur Verfügung gestellt.
Darauf basieren auch meine ersten Versuche mit diesem Display.
Hier das PCD8544 Datenblatt für die Ansteuerung des Displays.
Und das Programm
// LCD Display vom Nokia 5110
// http://www.youtube.com/playlist?list=PLjzGSu1yGFjXWp5F4BPJg4ZJFbJcWeRzk
//
// Matthias Busse Version 1.3 vom 13.9.2014

static const byte ASCII[][5] = {// ASCII Tabelle mit Fonts
 {0x00, 0x00, 0x00, 0x00, 0x00} // 20
,{0x00, 0x00, 0x5f, 0x00, 0x00} // 21 !
,{0x00, 0x07, 0x00, 0x07, 0x00} // 22 "
,{0x14, 0x7f, 0x14, 0x7f, 0x14} // 23 #
,{0x24, 0x2a, 0x7f, 0x2a, 0x12} // 24 $
,{0x23, 0x13, 0x08, 0x64, 0x62} // 25 %
,{0x36, 0x49, 0x55, 0x22, 0x50} // 26 &
,{0x00, 0x05, 0x03, 0x00, 0x00} // 27 '
,{0x00, 0x1c, 0x22, 0x41, 0x00} // 28 (
,{0x00, 0x41, 0x22, 0x1c, 0x00} // 29 )
,{0x14, 0x08, 0x3e, 0x08, 0x14} // 2a *
,{0x08, 0x08, 0x3e, 0x08, 0x08} // 2b +
,{0x00, 0x50, 0x30, 0x00, 0x00} // 2c ,
,{0x08, 0x08, 0x08, 0x08, 0x08} // 2d -
,{0x00, 0x60, 0x60, 0x00, 0x00} // 2e .
,{0x20, 0x10, 0x08, 0x04, 0x02} // 2f /
,{0x3e, 0x51, 0x49, 0x45, 0x3e} // 30 0
,{0x00, 0x42, 0x7f, 0x40, 0x00} // 31 1
,{0x42, 0x61, 0x51, 0x49, 0x46} // 32 2
,{0x21, 0x41, 0x45, 0x4b, 0x31} // 33 3
,{0x18, 0x14, 0x12, 0x7f, 0x10} // 34 4
,{0x27, 0x45, 0x45, 0x45, 0x39} // 35 5
,{0x3c, 0x4a, 0x49, 0x49, 0x30} // 36 6
,{0x01, 0x71, 0x09, 0x05, 0x03} // 37 7
,{0x36, 0x49, 0x49, 0x49, 0x36} // 38 8
,{0x06, 0x49, 0x49, 0x29, 0x1e} // 39 9
,{0x00, 0x36, 0x36, 0x00, 0x00} // 3a :
,{0x00, 0x56, 0x36, 0x00, 0x00} // 3b ;
,{0x08, 0x14, 0x22, 0x41, 0x00} // 3c <
,{0x14, 0x14, 0x14, 0x14, 0x14} // 3d =
,{0x00, 0x41, 0x22, 0x14, 0x08} // 3e >
,{0x02, 0x01, 0x51, 0x09, 0x06} // 3f ?
,{0x32, 0x49, 0x79, 0x41, 0x3e} // 40 @
,{0x7e, 0x11, 0x11, 0x11, 0x7e} // 41 A
,{0x7f, 0x49, 0x49, 0x49, 0x36} // 42 B
,{0x3e, 0x41, 0x41, 0x41, 0x22} // 43 C
,{0x7f, 0x41, 0x41, 0x22, 0x1c} // 44 D
,{0x7f, 0x49, 0x49, 0x49, 0x41} // 45 E
,{0x7f, 0x09, 0x09, 0x09, 0x01} // 46 F
,{0x3e, 0x41, 0x49, 0x49, 0x7a} // 47 G
,{0x7f, 0x08, 0x08, 0x08, 0x7f} // 48 H
,{0x00, 0x41, 0x7f, 0x41, 0x00} // 49 I
,{0x20, 0x40, 0x41, 0x3f, 0x01} // 4a J
,{0x7f, 0x08, 0x14, 0x22, 0x41} // 4b K
,{0x7f, 0x40, 0x40, 0x40, 0x40} // 4c L
,{0x7f, 0x02, 0x0c, 0x02, 0x7f} // 4d M
,{0x7f, 0x04, 0x08, 0x10, 0x7f} // 4e N
,{0x3e, 0x41, 0x41, 0x41, 0x3e} // 4f O
,{0x7f, 0x09, 0x09, 0x09, 0x06} // 50 P
,{0x3e, 0x41, 0x51, 0x21, 0x5e} // 51 Q
,{0x7f, 0x09, 0x19, 0x29, 0x46} // 52 R
,{0x46, 0x49, 0x49, 0x49, 0x31} // 53 S
,{0x01, 0x01, 0x7f, 0x01, 0x01} // 54 T
,{0x3f, 0x40, 0x40, 0x40, 0x3f} // 55 U
,{0x1f, 0x20, 0x40, 0x20, 0x1f} // 56 V
,{0x3f, 0x40, 0x38, 0x40, 0x3f} // 57 W
,{0x63, 0x14, 0x08, 0x14, 0x63} // 58 X
,{0x07, 0x08, 0x70, 0x08, 0x07} // 59 Y
,{0x61, 0x51, 0x49, 0x45, 0x43} // 5a Z
,{0x00, 0x7f, 0x41, 0x41, 0x00} // 5b [
,{0x02, 0x04, 0x08, 0x10, 0x20} // 5c ¥
,{0x00, 0x41, 0x41, 0x7f, 0x00} // 5d ]
,{0x04, 0x02, 0x01, 0x02, 0x04} // 5e ^
,{0x40, 0x40, 0x40, 0x40, 0x40} // 5f _
,{0x00, 0x01, 0x02, 0x04, 0x00} // 60 `
,{0x20, 0x54, 0x54, 0x54, 0x78} // 61 a
,{0x7f, 0x48, 0x44, 0x44, 0x38} // 62 b
,{0x38, 0x44, 0x44, 0x44, 0x20} // 63 c
,{0x38, 0x44, 0x44, 0x48, 0x7f} // 64 d
,{0x38, 0x54, 0x54, 0x54, 0x18} // 65 e
,{0x08, 0x7e, 0x09, 0x01, 0x02} // 66 f
,{0x0c, 0x52, 0x52, 0x52, 0x3e} // 67 g
,{0x7f, 0x08, 0x04, 0x04, 0x78} // 68 h
,{0x00, 0x44, 0x7d, 0x40, 0x00} // 69 i
,{0x20, 0x40, 0x44, 0x3d, 0x00} // 6a j
,{0x7f, 0x10, 0x28, 0x44, 0x00} // 6b k
,{0x00, 0x41, 0x7f, 0x40, 0x00} // 6c l
,{0x7c, 0x04, 0x18, 0x04, 0x78} // 6d m
,{0x7c, 0x08, 0x04, 0x04, 0x78} // 6e n
,{0x38, 0x44, 0x44, 0x44, 0x38} // 6f o
,{0x7c, 0x14, 0x14, 0x14, 0x08} // 70 p
,{0x08, 0x14, 0x14, 0x18, 0x7c} // 71 q
,{0x7c, 0x08, 0x04, 0x04, 0x08} // 72 r
,{0x48, 0x54, 0x54, 0x54, 0x20} // 73 s
,{0x04, 0x3f, 0x44, 0x40, 0x20} // 74 t
,{0x3c, 0x40, 0x40, 0x20, 0x7c} // 75 u
,{0x1c, 0x20, 0x40, 0x20, 0x1c} // 76 v
,{0x3c, 0x40, 0x30, 0x40, 0x3c} // 77 w
,{0x44, 0x28, 0x10, 0x28, 0x44} // 78 x
,{0x0c, 0x50, 0x50, 0x50, 0x3c} // 79 y
,{0x44, 0x64, 0x54, 0x4c, 0x44} // 7a z
,{0x00, 0x08, 0x36, 0x41, 0x00} // 7b {
,{0x00, 0x00, 0x7f, 0x00, 0x00} // 7c |
,{0x00, 0x41, 0x36, 0x08, 0x00} // 7d }
,{0x10, 0x08, 0x08, 0x10, 0x08} // 7e ←
,{0x78, 0x46, 0x41, 0x46, 0x78} // 7f →
};

#define RST 12
#define CE 11
#define DC 10
#define DIN 9
#define CLK 8

void LcdWriteString(char *characters) {
  // String ausgeben
  while(*characters) LcdWriteCharacter(*characters++);
}

void LcdWriteCharacter(char character) {
  // ASCII Zeichen ausgeben aus der Tabelle oben
  for(int i=0; i < 5; i++) LcdWriteData(ASCII[character - 0x20][i]);
  LcdWriteData(0x00);
}

void LcdWriteCmd(byte cmd){
  // Kommando an Display senden
  digitalWrite(DC, LOW); //DC pin is low for commands
  digitalWrite(CE, LOW);
  shiftOut(DIN, CLK, MSBFIRST, cmd); //transmit serial data
  digitalWrite(CE, HIGH);
}

void LcdWriteData(byte cmd){
  // Daten an Display senden
  digitalWrite(DC, HIGH); //DC pin is high for data
  digitalWrite(CE, LOW);
  shiftOut(DIN, CLK, MSBFIRST, cmd); //transmit serial data
  digitalWrite(CE, HIGH);
}

void LcdClearScreen() {
  // Bildschirm leeren
  for(int i=0; i < 504; i++)
    LcdWriteData(0x00);
}

void LcdXY(int x, int y) {
  // an X / Y Position gehen
  LcdWriteCmd(0x80|x); // Spalte
  LcdWriteCmd(0x40|y); // Zeile
}

void setup(){
  pinMode(RST, OUTPUT);
  pinMode(CE, OUTPUT);
  pinMode(DC, OUTPUT);
  pinMode(DIN, OUTPUT);
  pinMode(CLK, OUTPUT);
  digitalWrite(RST, LOW);
  digitalWrite(RST, HIGH);
  LcdWriteCmd(0x21); // LCD extended commands
  LcdWriteCmd(0xB8); // set LCD Vop (contrast)
  LcdWriteCmd(0x04); // set temp coefficent
  LcdWriteCmd(0x14); // LCD bias mode 1:40
  LcdWriteCmd(0x20); // LCD basic commands
  LcdWriteCmd(0x0C); // LCD normal video
  LcdClearScreen();
}

void loop() {
  LcdClearScreen();
  LcdXY(10,0);
  LcdWriteString("Hallo Welt!");
  delay(5000);
}
Der Stromverbrauch vom Display liegt gemessen bei ca. 0,16mA.
Damit ist das Display gut für eine Batterie Anwendung geeignet. Dafür war es ja auch mal gedacht im Nokia Handy.
von Matthias Busse


Pingback: Barometer Display mit 1h / 3h Differenz und Temperatur Ausgabe. Mit dem 5110 Display, BMP-180, Uno | Shelvin – Elektronik ausprobiert und erläutert
Hallo, ich versuche auf diese weise mein OLED-Display SSD1306 128X64 I2C (/* clock=*/ SCL, /* data=*/ SDA, /* reset=*/ U8X8_PIN_NONE); // OLEDs without Reset of the Display
zum laufen zu bringen ohne eine Library!
Können Sie mir da helfen, so wie dieses Beispiel nur für das Oled-Display?
Mit dem Nokia 5110 Display funkioniert es ja!
Herzlichen Dank
Pingback: Nokia 5110 am STM8S105 – Steppi